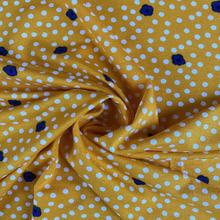
I bought 1.5 metres of this viscose jersey called ‘Sunny Spring’ for £15.00 from Stitchy Bee just last month. Remembering how well the Cowl neck Freya from Tilly and the Buttons book ‘Stretch’ works with this substrate, decided that was exactly what I would make with this length of fabric.
Sunny Spring viscose jersey £10/metre from Stitchy Bee
My copy of the pattern is now Tried and Tested so this time the construction was very straightforward. I stitched mostly using my overlocker but also the sewing machine for the top stitching around the neckline and twin needles for the hem on the body of the Freya.
Cowl neck Freya in Sunny Spring viscose jersey
It took just a couple of hours this afternoon to complete the top which fits very nicely into my ‘Spring Greens and Daffodils’ theme. The top looks good with both Grey and Blue denim jeans and will be comfortable and smartly casual.
Time to revisit the Sewaholic Fraser top view B. I last made this back in February this year with some inexpensive Ponte that I had purchased from an eBay seller.
HAPPY STRIPES French Terry from Stitchy Bee
This time I was using a stunningly soft, fine French Terry called Happy Stripes designed for you by POPPY Europe Oeko-Tex 100. This has beautiful painterly stripes on an ivory background. A gorgeous fabric with a fine looped reverse from Stitchy Bee. The fabric costs £15.00 per metre and I bought 1.5 metres but worth every single penny!
The fabric is 160cm wide, has a composition - 95% Cotton 5% Elastane. Oeko-Tex Confidence Compliant - Tested for harmful substances. So I wanted a top that would compliment this fantastic fabric.
For my Fraser top there were just a few minor alterations to the pattern; I cut a generous size 20 and used only ¼ inch side seams. Lowered the front neckline 1 ½ inches at centre front then graded back to the original neckline. Added 3 inches to the length of the front and back body patterns. Added the neckband (cut 2 inches wide) and sleeve bands cut so that the stripes were vertical and ignored the hem bands on this version.
Matching stripes was relatively easy, especially as I had noticed that they were uneven so made sure to cut out all pieces in the same direction.
Fraser view B in HAPPY STRIPES
Conclusions: The sleeve hem bands were great but I will probably go back and re-cut the neckline wider and lower so will need another neckband and this time a little narrower than before. Other than that a great new top that will coordinate with many ‘bottoms’.
Having completed the Kitty dress in Autumnal tones Feather print viscose I began planning my Spring sewing collection which I have called ‘Spring Green and Daffodils’.
First I made the pin tucked tunic top (B6024) that has been on my ‘to do’ list for several years. Then I wanted to make another Yellow/Mustard dress that would have different features to my current Yellow Springtime dress.
I bought a length of Golden Yellow/Pale Mustard Floral Breeze viscose from JJTextiles, Manchester for £18.00 back on 13th November 2020. I had 4 metres of this fabric and decided to use my TNT ‘Moira’ pattern to make a dress with deep hem frill. Originally I had intended to add full length sleeves gathered into a cuff. Then I thought I would draft a fuller short sleeve that would be gathered into a frilled cuff but when it came to cutting out, I stuck to the standard sleeve. If I had sufficient fabric I would possibly add a frill to the hem of the sleeves.
Construction of this dress is like a well-oiled machine. There is a full lining in Ivory Viscose Voile that was purchased in bulk from the Fabric Room. I can usually complete the sewing in two sessions but this time due to interruptions and a bout of illness it has taken several.
Moira #9 in Viscose from JJ Textiles, Manchester
At last it is completed, as usual I am pleased with the resultant dress that is so comfortable and easy to wear. Now I can get on with the next project on my ‘to make’ list.
I have had this tunic top on my eBay watch list for over a year. Having checked the price for this 90%polyester/10% cotton blend and read the reviews which were not particularly good I knew that I would have to make my own. Now finally I have got around to making my version using this pretty quilting cotton print fabric.
Quilting Cotton fabric bought at Festival of Quilts pre 2018
I bought a length of about 3 metres several years ago at the Festival of Quilts and have made view B of the pattern Butterick B6024.
I have used this pattern before for both a tunic top and also extended to full length for nightdresses so did not feel that it would be necessary to make a toile. I made just 2 changes to the pattern by shortening the sleeves by 2 inches and the body by 1 inch before cutting out the fabric. In my haste, I forgot that the fabric had not been washed so I hope that there will be problems once the tunic top has been laundered.
Construction was straightforward, the only change that I made was to stitch the bias binding on the neckline in reverse, i.e. stitched to the inside first then turned to the right side and top-stitched in place. The sleeve elastic casing was made ½ inch wide. I used cord elastic cut to a length so that once in place there was no tension and thus no impression left on my forearm should I push the sleeves up beyond my elbow. All seams were overlocked and the narrow hem was overlocked, turned twice and top-stitched in place.
B6024 view B in Quilting cotton fabric
Conclusion: There is some ‘dressing’ in the fabric which means the tunic is not as soft as I would like. I hope that this will improve once laundered. If I make the top again, probably in viscose to improve the drape, I will add back the 1 inch length but leave the sleeves as before.
This is yet another version of my self-drafted ‘Kitty’ dress which I originally created a few years ago.
I had to re-draft to a slightly larger size due to ‘lockdown weight gain’. The bodice has bust and waist darts. The shawl collar is shaped with a gentle curve finished with self-fabric frills that have rolled hems completed on my Juki overlocker. The front bodice buttons to the high waistline and ties at the back to allow it to be worn in a fitted or loose style.
Feathers on Terracotta background Viscose from Rainbow Fabrics
For this version of Kitty I used some pretty feather print on a Terracotta background viscose bought from Rainbow Fabrics last year. The fabric was a 3 metre remnant at a cost of just £10.91.
After cutting out the bodice and sleeves, I cut 2 skirt panels measuring 40 inches wide x 30 inches length. You will notice that on my sketch the frill extends down the front button closure. However as this was a single layer frill, I kept the frill to edge the collar only so that the wrong side of the fabric did not show. For the frills I cut 2 x 30 inches x 2+5/8 ths inches wide that were stitched together to make a long frill of 60 inches before hemming using the rolled hem function on my Juki overlocker.
The combined front facing and collar was interfaced with some lightweight fusible and then the frill was gathered and applied with right side together. made the rear neck facing extra deep so that I could add my ‘Carousel’ label but the front facing was kept to 2½ inches wide. I find this type of collar is very easy to complete but the addition of the gathered frill set between the outer and facing made it a little more fiddly. The sleeves were very easy to set into the armholes with no tucks or gathers. The hems were overlocked before turning up by 1 inch and machine top-stitching in place. I added 5 buttons from my stash for the front closure and an spare is stitched inside on one of the seam allowances.
The skirt was made from two panels 40 inches wide x 30 inches long. The concealed pockets were set into the side seams before the top edge was gathered with two rows of 5mm long stitches. This fabric is so light and has great drape that the drawing up of the gathers was particularly easy. The result is a very comfortable ‘swishy’ skirt. The hem was overlocked before a double turn and machine stitched in place.
Self-drafted ‘KITTY’ dress
I overlocked the seam allowances rather than use French seams.
This was a comparatively easy make as I was anxious to get the dress completed before I move onto ‘Spring Greens’ and ‘Daffodil Yellow’ projects. I have left it rather late to make this dress which has a distinct ‘autumnal’ feel. It is unlikely that it will be worn a great deal until late September and October when the Autumn season is in full swing.
OK….. I decided to abandon the attempt to draft a draped front neckline for the top to coordinate with the button through skirt. Instead, I would repeat the ‘Moira’ top that I just made using the Butterlfy printed Crepe de Chine.
Selina top by Style Arc patterns
I was inspired by Alex Judge’s latest post on youtube. Alex’s top was the Selina by Style Arc but as I don’t have that pattern and am trying to budget for a large car repair bill, I simply ‘borrowed’ some of the styling ideas from that garment. I lengthened the top to tunic length, graded out from waist to hemline to give a more ‘draped’ effect and shaped the hemline front and back to a gentle curve. Once again I lowered the centre front of the neckline by 1½ inches and this time rather than bias binding for the neckline, due to bulk, I drafted facings.
The facings were interfaced and my custom label applied to the back facing. Once attached to the front and back bodice the seam was trimmed and under-stitched. To ensure that the facings stayed in place I then top-stitched which also gives a little extra detail. The side seams were stitched with French seams and the sleeves inserted, again using French seams. The hems of the sleeves were overlocked before a double turn narrow hem top-stitched in place.
Now onto the hem of the tunic…. The Selina top has a pretty frill detail and as there was sufficient fabric I decided to replicate the hem frill. I cut 3 strips 3 inches wide to fit the curved bodice hemline after it had been pleated. The strips were joined together and finished with a rolled hem using my Juki overlocker. The frill was gathered using the pleater foot at a setting of every 6 stitches, stitch length 4.00mm. The seam was neatened with the overlocker and top-stitched in place.
‘Moira’ frilled hem Tunic Top
I am absolutely delighted with the top which can be worn with the skirt or as a tunic over trousers. The fabric has lovely drape and is really comfortable to wear.
Having failed my first attempt at drafting a draped front neckline I tried for a second time. I used some pretty Butterfly printed Polyester Crepe de Chine that had been in my ‘goody bag’ at the SEW SOUTHAMPTON 2018 meetup. I had got as far as cutting out the version#2 and even stitching the bust darts when I realised that I had made a fundamental error with the slashing and spreading!
I quickly retrieved the original ‘Moira’ front bodice pattern and re-cut the shoulders and neckline of my part-stitched top. I lowered the front neckline slightly and then continued with the construction of what would now be a ‘Moira’ top.
All seams were sewn with French Seams including setting in the sleeves. Hems were overlocked before folding up twice to make narrow top-stitched hems. The neckline had a narrow double folded bias binding and this great new shell top was finished!
In anticipation of making a draped neckline top in some of the Hidden Cheetah viscose linen, I needed to draft a new pattern. Using a post on the Craftsy website as a guide, I traced and extended the length of the front pattern piece of the Moira dress. I cut and spread as directed for the draped neckline and although the Hidden Cheetah is a woven fabric, I then made up a toile using some of the Pink cotton jersey bought from Rainbow Fabrics just to see how the first trial looked.
The conversion of the Moira bodice to a top seems to have worked OK but unfortunately there is not a great deal of drape in the front neckline. Thus this make is definitely classed as a ‘failure’.
‘Failure’ draped neckline top
I will re-draft the bodice and see if I can improve the draping. Meantime, this one will be relegated as a lightweight jersey top to be used as a PJ top.
I originally purchased 4m of this Hidden Cheetah viscose linen at £6.69/metre back in June 2020 from the Textile Centre. I was planning to make the Bastion Culottes. However, at the time I did not get around to it but the fabric had been laundered and was in my stash pile.
Back in the 1980’s I had a favourite midi-length plain Cream skirt that had a fixed waistband into gathers. There were brass buttons down the front and concealed side seam pockets. The finishing touch was broderie anglaise trim around the hem.
I loved that skirt and decided that although the Hidden Cheetah is a print it would be a suitable replacement/wearable toile. I have made the Jenna skirt by Seamwork patterns several times before and it has the advantage of an elasticated back waistband. I used the waistband from the Jenna skirt and then cut rectangles for the two fronts and the back skirt panels. I also used the inseam pocket pattern from the Jenna.
Making up the skirt was straightforward. I made French seams throughout. I doubled up on the fusible interfacing for the front waistband and also fused a 3 inch wide length on the two front edges to support the buttons and buttonholes. I was most fortunate to find an almost exact colour match for the buttons in my stash. There is even a spare stitched inside the button band. I turned up and hand stitched a 3 inch hem to give some weight to the skirt as I discovered that the viscose linen was very lightweight.
Button thru’ skirt with back elasticated waist
Having dressed the mannequin in the skirt I could not find any suitable tops! For the time being it has been photographed with a plain Black polo neck which I never wear.
The final part of this reincarnation of my long-lost skirt was to apply a broderie anglaise trim to the hem. I could only find a brilliant white trim in my stash and so I have tea-dyed the 3 metre length which is now drying on the airing rack. I will audition the trim tomorrow and if it is acceptable, will machine to the bottom of the skirt. Currently the finished length is 29 inches but with the trim it should finish at about 31 inches.
Idea for draped neck short sleeve top
I have sufficient fabric to make a coordinating top and having draped on the mannequin will now draft a draped neck, short sleeve shell top to be worn with the skirt. I also have some lovely dobby spot viscose in Ivory so will make sure that gets made up soon rather than later.
Back in November 2018 I made a top using this fabric that I originally purchased from Stitchy Bee. That particular top was worn a great deal despite not being exactly right. I had only purchased one metre of fabric and thus the length of the bodice was a little shorter than I like and the sleeves were a little too long. All through 2019 I tried to find an alternative supplier but to no avail. Imagine my delight when I saw that the fabric was again available, this time from Minerva. The fabric is by Lady McElroy and is a96% viscose Ponte Roma. I ordered 1.5 metres at £17.99 per metre as I knew that I wanted to make a long-sleeved top using my hack of the Freya by Tilly and the buttons. My third expensive top coming up!
Learning from the error on the Tattoo scuba top, this time I cut the Freya longer in the body. I cut the long sleeves and also cuffs. I lowered the centre front of the neckline by 1½ inches and cut a neckband 2 inches wide.
Apart from top-stitching the neckband and twin-needle stitching the hem, the entire garment was sewn on the overlocker. A real speedy make!
I am absolutely delighted with this top and can’t wait to wear it. I think it will coordinate well with denim jeans, skirts and when the weather warms up – with lighter coloured bottoms.